


Showing posts with label Wassim Jelassi. Show all posts
Showing posts with label Wassim Jelassi. Show all posts
Monday, June 9, 2014
CT Tutorial: Sunfire

Monday, May 12, 2014
Tropical Sensation

Sunday, May 11, 2014
"African Beauty"


Tuesday, March 25, 2014
Romancing The Heart

This tutorial is featuring the amazing artwork of Wassim Jelassi
You can find this tutorial ...
....................................................................................


Tuesday, March 18, 2014
Wassim Jelassi- Fox CT Tag
****WJ Fox CT tag****
CT Tag for Artistic Dreams Imaging
CT Tag for Artistic Dreams Imaging
Tube © Wassim Jelassi-HERE
What a sensuous look to this tube


Monday, July 29, 2013
Wassim Jelassi ~ Timelines
Artist ~ Wassim Jelassi
Entangled by Alicat
Facebook Timeline

Artist ~ Wassim Jelassi
Japanese Umbrella by Alicat

Facebook Timeline

Saturday, March 23, 2013
Painting Princess Tut Featuring Artwork by Wassim Jelassi

For this Tutorial I am using the work of
You can find her work at
If using this tube make sure you have the proper licenses.
The Scrap I used is by
"Rissa's Designs"
It is called "Misfit Princess"
It is called "Misfit Princess"
Mask I am using is
You will need filter
Tramages
Tramages
Lets get started ...
Open 800 x800 white image


No worries you can re-size after tag is finished.
Add RD Paper #17 as background paper
Layers
Load/Save Mask
Mask/montiblindsmask1
Create Mask From/Source luminance
Orientation/Fit To Canvas
Options/Invert Transparency/Hide Mask


Load
Add RD Paper #3
Open RD#78 (FRAME) - Copy
Close out of the original RD#78
Paste RD#78 (FRAME) as New Image
Resize 500 x 500
Copy - paste as new layer
Add RD Paper #3
Open RD#78 (FRAME) - Copy
Close out of the original RD#78
Paste RD#78 (FRAME) as New Image
Resize 500 x 500
Copy - paste as new layer
Highlight RD#3
Add your tube re-size if needed.
Duplicate Mirror
Highlight bottom tube
Adjust - Hue and Saturation - Colorize


Add your tube re-size if needed.
Duplicate Mirror
Highlight bottom tube
Adjust - Hue and Saturation - Colorize


Merge down onto RD Paper #3
Highlight RD#78 Frame - Duplicate and move below your tube
With top Frame highlighted
Use your Eraser Tool

Erase Frame for what part of the tube you'll want
coming out of the frame.
Highlight bottom frame
Magic Wand
Click inside frame
Selections - Invert
Highlight tube - Eraser tool at 50% now,
Erase the bottom part of the tube so it won't be showing below the frame
Selection - Select None (Deselect)
Magic Wand again inside bottom frame
Selections/Modify/Expand by 5 pixels
Highlight RD Paper #3
Selections/Invert/delete
Now top frame -tube - bottom frame
Add a Drop Shadow with setting as
Vertical : -2
Horizontal : 2
Opacity : 75
Blur : 5.00
 Merge Down top frame onto tube
Merge these down onto bottom frame
Add what elements you want to go above the framed image.
I used RD1 and RD21 using the eraser tool 25% I erased part of
RD21 so it looks like her elbow is over it.
Merge these to element down onto the frame.
Add a Drop Shadow with setting as
Vertical : -2
Horizontal : 2
Opacity : 75
Blur : 5.00

Merge these down onto bottom frame
Add what elements you want to go above the framed image.
I used RD1 and RD21 using the eraser tool 25% I erased part of
RD21 so it looks like her elbow is over it.
Merge these to element down onto the frame.
Merge down RD Paper #3 onto your mask background
Now new layer and add you copyright info. and your name.
Animation
Highlight your background paper
Effects - Tramages - Pool Shadow


Effects - Tramages - Pool Shadow

Change Intensity: 73 and Lightness: 62

Shift -D to make a copy
Copy Merged or ctrl+shift+c
Open Animation Shop paste as new animation or ctrl+v
Back to PSP
Delete the copy
Delete the copy
On Original click back arrow to remove your effects
Effects - Shadow Pool again
Change Intensity 83
Shift - D
Effects - Shadow Pool again
Change Intensity 83
Shift - D
Copy Merged or ctrl+shift+c
Back to Animation shop
Paste after current frame or shift+ctrl+L
Back to PSP
Delete the copy
Delete the copy
On Original click back arrow to remove your effects
Effects - Shadow Pool again
Change Intensity 95
Shift D
Effects - Shadow Pool again
Change Intensity 95
Shift D
Copy Merged or ctrl+shift+c
Keep frame properties at 10 and save.
Would love to see your results. ♥
-----------------------------------------------------------------------


-----------------------------------------------------------------------
--------------------------------------------------------------------------------------
SNAGS


Saturday, February 23, 2013
Kaedee's Graphics/Wassim Jelassi
The leprechans are coming. It's that time of year again. When all things begin to turn green. Are you Irish? maybe just for St Patrick's Day everyone one is a little Irish.
Kaedee's Graphics has released some really cute leprechans for the season. There is a scrolling stationery and some snaggables/extras using one of her adorable little guys.
I also had a chance to play with a new release from Wassim Jelassi. I really like how this particular stationery came out. Besides the stationery I normally make, I also made a collection of days of the week - something different, lol - plus the snaggables.extras.
Please don't use either artist's artwork without proper license.


Wednesday, April 25, 2012
New Wassim Jelassi tutorial

Tuesday, April 17, 2012
" I Will Love You Forever Tut Featuring Wassim Jelassi "

For this Tutorial I am
using the work of
This tube is PTU so you
can find their work at
If using this tube make
sure you have the proper licenses.
You can use my rotated
lines you can find them here …
You will need no
Filters
Lets get started ...
Open 600 x 250 image
Pick 2 colors
Foreground Light
Background Dark
Gradient
Angle: 0
Repeats: 0
Invert: Checked
Style:Linear
Flood Fill with your
Gradient
Add your tubes re-size
if needed
front tube
V: -5 H: 5 Opacity:
75 Blur: 10.00
Your background tube
Blend Mode/Luminance
Opacity: 72%
Add the lines
Re-size if needed
Drop Shadow
V: -2 H: 2 Opacity:
50 Blur: 5.00
Effects/Distortion/Wave
Horizontal Displacement
Amplitude: 2
Wavelength: 30
Vertical Displacement
Amplitude: 1
Wavelength: 30
Add new layer
Selections/Select All/Contract by 2/Invent
then flood file with
the color of your chance.
Re-size: 98%
Add new layer/ Flood
fill another color
Selections/Select
All/Contract by 2/Invent
Re-size: 98%
Now deselect.
Now new layer and add
you copyright info. and your name.
Merge/Merge Visible
Animation
Adjust/Add/Remove noise
Gaussian: 20
Copy Merged or
ctrl+shift+c
Open Animation Shop
paste as new animation or ctrl+v
Back to PSP
Click back arrow
Adjust/Add/Remove noise
Uniform: 20
Copy Merged or
ctrl+shift+c
Back to Animation shop
Paste after current
frame or shift+ctrl+L
Back to PSP
Click back arrow
Adjust/Add/Remove noise
Random: 20
Keep frame properties
at 10 and save.
Would love to see your
results.


Saturday, March 31, 2012
'Purple Lingerie' Forum Set Tutorial featuring Wassim Jelassi

Sunday, March 25, 2012
Wassim Jelassi-3 Tubes that will be released soon
Here is a tag with 3 tubes that will be released soon by Wassim Jelassi at ADI.

Tubes Are: Mascarade on the right
Cora (Redhead) in the Middle
Blue Love twice on the left.
Tubes Are: Mascarade on the right
Cora (Redhead) in the Middle
Blue Love twice on the left.
Wassim Jelassi-Cora

Friday, March 23, 2012
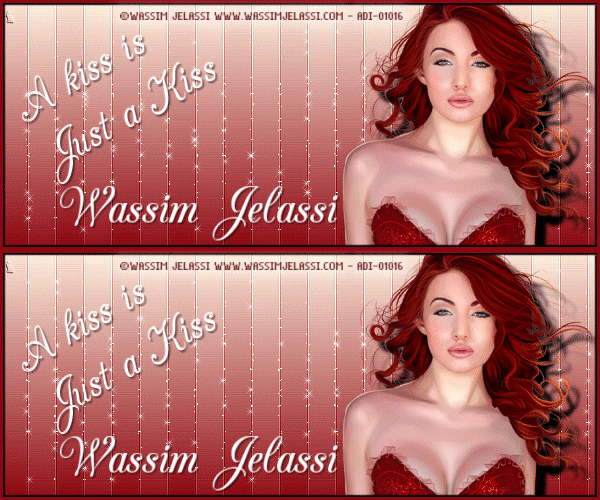
" A KISS " Tutorial & Signature Tags Featuring Wassim Jelassi Work

For this Tutorial I am
using the work of
This is a PTU tube,
You can purchase this
from
If using this tube make
sure you have the proper licenses.
You will need the
Filters
DSB Flux
Alien Skin Xenofex 2
Lets get started ...
Open 600 x 250 image
Add your tube resize if
you want.
Pick 2 colors
Foreground Light
Background Dark
Gradient
Angle: 0
Repeats: 0
Invert: Checked
Style:Linear
Flood Fill with your
Gradient
Gaussain Blur : 15.00
Add your tube again
move to right side
Drop shadow
Vertical : 10
Horizontal : 10
Opacity : 100
Blur : 5.00
Add new layer
Selections/Select All/Contract by 2/Invent
then flood file with
the color of your chance. Now deselect.
Now new layer and add
you copyright info. and your name.
Merge/Merge Visible
DSB Flux/Linear
Transmission Filter
Slice Size : 3
Offset : 5
Blend : 50
Effects/Edge
Effects/Enhance
Do this 2 times
Animation
Alien Skin Xenofex
Constellation
Setting/Small Star
Constellation
Star Size (pixel) :
2.00
Copy Merged or
ctrl+shift+c
Open Animation Shop
paste as new animation or ctrl+v
Back to PSP
Click back arrow
Alien Skin Xenofex
Constellation
Setting/Small Star
Constellation
Click Random tab once
Copy Merged or
ctrl+shift+c
Back to Animation shop
Paste after current
frame or shift+ctrl+L
Keep frame properties
at 10 and save.
Would love to see your
results.

Subscribe to:
Posts
(Atom)
Grab Our Button


