


Saturday, March 3, 2012
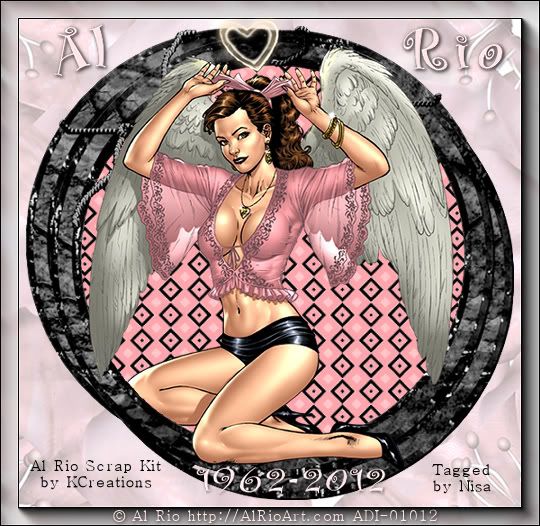
" Al Rio Angel's In The Spotlight"

For this Tutorial I am using the work of
©Al Rio
©Al Rio
Al Rio may you Rest In Peace
Birth 05/19/62 Passing 01/31/12
You can find his work at ...
Artistic Dreams Imaging
Birth 05/19/62 Passing 01/31/12
You can find his work at ...
Artistic Dreams Imaging
If using these tubes make sure you have the proper licenses.
You will need the Filters
Greg`s Factory Outlet Vol. 2
Lets get started ...
Open 600 x 250 image
Pick 2 colors
Foreground Light
Background Dark
Gradient
Angle: 0
Repeats: 0
Invert: Checked
Style:Linear
Flood Fill with your Gradient
Add your tubes resize if you want.
One to the side duplicate/mirror
Blend mode/Luminance(Legacy)
Opacity:82
Add new layer Selections/Select All/Contract by 2/Invent
then flood file with the color of your chance. Now deselect.
Now new layer and add you copyright info. and your name.
Merge/Merge Visible
Animation
Highlight background
Effects/Greg`s Factory Outlet Vol.2
Spotlight
X: 128
Y: 128
Size: 120
Focus:120
Inner Gain: 158
Outer Gain: 32
Copy Merged or ctrl+shift+c
Open Animation Shop paste as new animation or ctrl+v
Back to PSP
Click back arrow
Effects/Greg`s Factory Outlet Vol.2
Spotlight
X: 202
Y: 120
Focus:120
Inner Gain: 158
Outer Gain: 32
Copy Merged or ctrl+shift+c
Back to Animation shop
Paste after current frame or shift+ctrl+L
Back to PSP
Click back arrow
We are going from right to left images
Effects/Greg`s Factory Outlet Vol.2
Spotlight
X: 50
Y: 50
Size: 120
Focus:120
Inner Gain: 158
Outer Gain: 32
Frame Properties/Ctrl+A
Altr/Enter: 50
I hope you enjoyed this tutorial,
I would love to see your results.
Show Off Tag Featuring K Creations Rio Memory Scrapkit
Show off tag featuring the artwork of Al Rio and
the amazing work of K Creations Rio Memory
Scrap kit. You can purchase the tube and the kit


Rio Angels Tutorial Featuring K Creations Memory Kit
Rio Angels
This tutorial was written on March 3,2012.
This tutorial was written on March 3,2012.
Any similarities to another tutorial is purely coincidental.
All my tutorial are register with My Free Copyright.
All my tutorial are register with My Free Copyright.
Please do not claim as your own.
This tutorial writer assumes you have a
This tutorial writer assumes you have a
working knowledge of using Paint Shop Pro.
This tutorial was done in Paint Shop Pro9,
This tutorial was done in Paint Shop Pro9,
but can be adapted to use in other
Paint Shop Pro versions.
Paint Shop Pro versions.

SUPPLIES NEEDED
Tube of choice: I'm using the awesome work of Al Rio.I used
Tube of choice: I'm using the awesome work of Al Rio.I used
Please do not use unless you have a license to do so.
Scrap kit called Al Rio Memorial Kit
You can purchase it HERE....Thank you Kari
Mask of choice:I am using Tonya mask #31
You can purchase it HERE....Thank you Kari
Mask of choice:I am using Tonya mask #31
-Template#4....Sara's blog is no longer there...please
use another template. If anyone know where
Sara is please email me
Filters used:Eye Candy 4000 gradient glow-HERE
Xero - Radiance..you can get it HERE
Font for name is Riesling and copy write is always done in Pixelette ...
Get them HERE
Drop shadow use through out H-2/V-2/O-65/B-6.00
Please leave a thank you when you downloading for supplies.
my tag is just a guide...please use your imagination and make the tag your own
you do not have to use any of the supplies I used.
LET'S BEGIN
Open up Template and ShiftD and close original...delete copyright layer
resize template 600x600 for space to work/we will resize again at the end/
close all layers/choose paper of choice/copy/paste and put underneath
brush layer/go to mask of choice with these setting

and click ok
On the following raster layers follow these directions...
activate circle layer/copy/paste paper of choice/go to circle layer
invert/go to paper layer and delete/delete original circle layer/add
drop shadow/keep activated
copy/paste Rio angle on top of lg circle layer/resize/place where you
want what part to show/circle layer invert/tube layer delete/xero -radiance
with these setting

click ok/deactivate/add drop shadow
copy/paste frame2/resize to fit around circle layer/add drop shadow
activate rectangle layer/copy/paste paper of choice/go to rectangle layer
invert/go to paper layer and delete/delete original layer/add drop shadow
copy/paste flower3/resize to fit rectangle/place at the bottom left of
rectangle/add drop shadow/now copy/paste flower2/resize to fit rectangle
place at the middle right of rectangle/add drop shadow/duplicate flower3
place it at the top left of the rectangle
activate bracket layer/copy/paste paper of choice/go to bracket layer
invert/go to paper layer and delete/delete original bracket layer/add
drop shadow
activate frame layer/copy/paste paper of choice/go to frame layer
invert/go to paper layer and delete/delete original frame layer/add
drop shadow
now add any elements to make your tag unique/
make it your own/remember
to add drop shadow on each element
copy/paste your tube where you want it/resize//
to add drop shadow on each element
copy/paste your tube where you want it/resize//
I used two angles/add
drop shadow
add your watermark and copyright credits/
drop shadow
add your watermark and copyright credits/
give it a slight gradient glow
...now give your tag to a friend.
You're done...thank you for trying my tutorial
please send me a copy so that I can show case it on my blog
riggsbee53@gmail.com


...now give your tag to a friend.
You're done...thank you for trying my tutorial
please send me a copy so that I can show case it on my blog
riggsbee53@gmail.com


Jenna Whyte Tube "Akane"
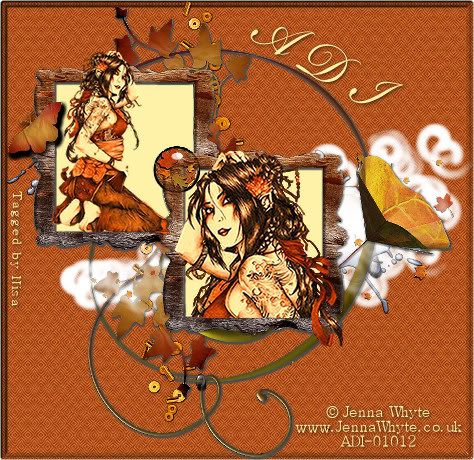
" AL RIO'S ANGEL"

Scrapkit
"ALRIO" Scrap this is also PTU
You can find his & her work at
Artistic Dreams Imaging
If using this tube or scrapkit make sure you have the proper licenses.
Lets get started ...
Open 500 x 500 image
Pick your frame/background that will go inside the frame
And Glitter to animate later
also the tube of your choice.
Add your background/Promote background layer
Add your tube resize if needed.
Add frame
Highlight frame
Magic Wand click inside your frame
Selection/Modify/Expand Selection/Number of pixels:3
Selection/Invert
Highlight background/Delete
Add tube resize if needed & a Element if you like.
Duplicate your frame
place above your tube & Element/Eraser tool
Erase this frame where you want.
Add new layer Selections/Select All/Contract by 2/Invent
then flood file with the color of your chance. Now deselect.
Now new layer and add you copyright info. and your name.
Merge/Merge Visible
Animation
Take your glitter to Animationshop
Insert Image Effects
Frames per second: 10 fps
Effects/Underwater
Custom
Underwater/Effects/ Apply Sunlight dappling
Liquid Properties/Water Depth: 30
Waves/waves:11
X: 0
Y: 0
On your Glitter frames
ctrl+A
Animation/Cull Animation
Remove 1 frame every 2 frames
DO THIS TWICE/ This will give you only 5 frames
Set your frame properties: 25
Now the done image you created in PSP copy/copymerge
AS/ Duplicate up to 5 frames
ctrl+A+C
Click on your glitter/Ctrl+A+E
Would love to see your results.
New Releases: Ralph Macrey, Artwhimsico, Terrell Dorfeo, Alex


Friday, March 2, 2012
Luck of the Irish Scrapkit by KCreations

Wassim Jelassi "Streeter"

Thursday, March 1, 2012
"LUCK OF THE IRISH"

For this Tutorial I am using the work of
©KCreations
You can find her work at
Artistic Dreams Imaging
If using this Scrapkit make sure you have the proper licenses.
Lets get started ...
New Image 500x500/White Background
Pick the background from the Scrap you want to use
copy/paste to new image re-size as need.
Copy and paste your tube/ re size if needed
Add a Frame re-size as needed
Make sure your frame is highlighted.
Click inside the frame with your
Magic wand/Selections/Select All
Highlight tube/Invert/Delete
Now highlight your background/Invert/Delete
Now add some of the element from your scrap
on the outside of your frame
And a nice one behind the frame if you want.
Add new layer Selections/Select All/Contract by 2/Invent
then flood file with the color of your chance. Now deselect.
Now new layer and add you copyright info. and your name.
Merge/Merge Visible
Take this Image to Animation,
Paste as new animation or ctrl+v
We will get back to this later,
Lets Animate our horseshoe
Animation
In PSP
I pick the horseshoe
Image/Canvas Size/300x300
Placement/Center
Duplicate twice making 3 frames
Frame 1
Image/Free Rotate: 20/Left
X out 1
Frame 2
Keep a as is
x out 2
Frame 3
Image/free Rotate: 20 right
x out 3
Open frame 1
File/Save As
Click Option making sure the the setting are correct
Save Options/Compression: LZ77
Version:PSP 5 compatible file
PSP 1
x out 1
highlight 2 remove the x
Save frame 2 as psp2
x out 2
highlight 3 remove the x
Save frame 3 as psp3
Now let`s go to our Animation-shop
File Animation Wizard
Same size as the first image frame
NEXT
Transparent
NEXT
Center In Frame
With Canvas color
Scale Frames to fit
Next
Yes,repeat the animation indefinitely
Frame speed: 25
Select: Frame3/2/1
Add Image
Next/Finish
Ctrl+A+C
Ctrl+A/Animation/Reverse Frames
Ctrl+A+C
Click on the last frame from the first 3 frame
Ctrl+A+E/Paste/After Current Frame
Now lets get back to the image we first added in animation-shop
highlight/duplicate up to 6 frames
Horseshoe/ Ctrl+A+C
Ctrl+A+E
I sure hope you enjoyed this Tutorial,
Would love to se your results.
Al Rio Angel & KCreations Al Rio Kit


Wednesday, February 29, 2012
Al Rio Angel and KCreations Al Rio Scrapkit


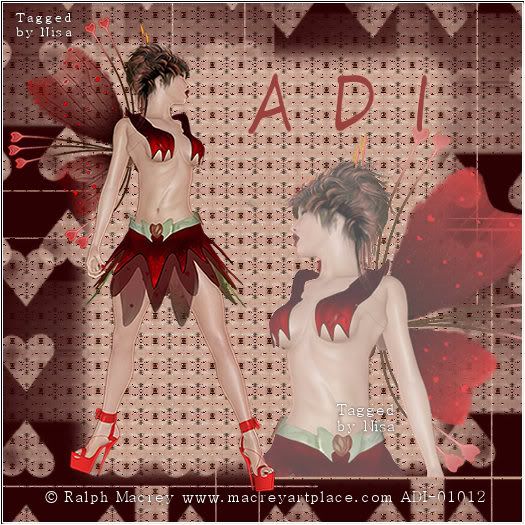
Ralph Macrey Faerie
March Artist of the Month


Tuesday, February 28, 2012
Judges for our Kidz Korner
ADI artist Robin Pushay has
graciously volunteered to act as a judge
during our Kidz Korner competition.
So, everyone . . . have the kids in your life
get their artwork ready!!

We are pleased to announce the opening of
Kidz Korner at
Artistic Dreams Imaging.
This
little korner of our world was created for the children in your life, whether they are your children,
grandchildren, nieces, nephews, students or neighbors.
A child's mind, their creativity should be nurtured so
we have opened our hearts and our website
for the young artists in your lives.
The Kidz Korner is for children through age 18
who wish to share their talent and creativity.
Art found in this area is not for
purchase but your
constructive thoughts and praise are
most welcome.
We accept all genre of art and we look
forward to
Submission requests should
include the following
information:
Parents Name
Address
Phone
Parents Email
Child's First Name
Child's Age
At the end of each quarter, 2 prizes will be awarded . . . one for First Place . . . one for Second Place.
First Place winners will not be eligible to participate in the selection process for 6 months after winning.
First Place winners will not be eligible to participate in the selection process for 6 months after winning.
Should you have any questions about Kidz Korner
feel free to contact us here
We hope you will enjoy this new area
of
Artistic Dreams Imaging.
**Artistic Dreams Imaging reserves the
right to alter, amend, modify or remove any of
the terms applicable to Kidz Korner at
our discretion and without notice. **
Warning - The unauthorized reproduction or distribution of this copyrighted work is illegal. Criminal copyright
infringement, including infringement without monetary gain, is investigated by the FBI and is punishable by up to
5 years in federal prison and a fine of $250,000 if convicted.
©2010-2012 Artistic Dreams Imaging
Monday, February 27, 2012
Al Rio Angel
This tube will be released soon at ADI
Ralph Macrey "Angel" Tube to be released soon
This is a beautiful new tube from Ralph Macrey that will be released soon on his page at Artistic Dreams.

NEW RELEASES!!
Al Rio
KCreations
Wassim Jelassi
Check out the images and scrapkits for these great
artists and designers!
Wassim Jelassi


Al Rio Angel


Sunday, February 26, 2012
Please Welcome KCreations to the ADI Family!
We are absolutely thrilled to announce the signing of scrapkit designer, Kari aka KCreations, to the Artistic Dreams Imaging family! You will be able to find Kari's beautiful scrapkits exclusively at ADI.
As a welcome present to all of our ADI license holders and followers, you can pick up this beautiful FREEBIE from Kari entitled Pastel Mini-Kit by just clicking the link below.

Stay tuned for some truly beautiful kits that Kari has in the works for you that will be released soon!
Subscribe to:
Posts
(Atom)
Grab Our Button