Current Time
Followers
Chat
Email Subscription
Calendar
NetworkedBlogs
Like Us on FB!
Saturday, August 24, 2013
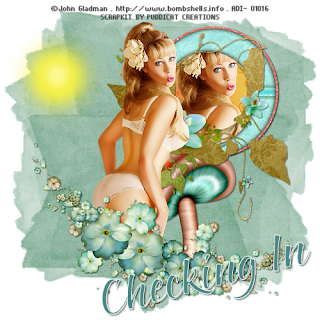
Summer's End Tutorial Featuring Artwork By John Gladman
For
this Tutorial I am using the work of
This
is a PTU Tube.
If
using this tube,
make
sure you have the proper licenses.
You
can get this tube at
I
am also using the Scrapkit called “Summer End”
this
is a PTU Kit you can find at
I
am using Mask from “Scrappy
Bit Of Fun”
Mask
96
You
can use any kind a mask you like.
You
will no Filters
Lets
get started ...
New
Image 800 x 800 Color: White
Open
pcd_paper 3
Copy
– Paste as new layer
Close
Original paper
Layers
– Load/Save Mask - Load Mask From Disk
With
setting as below.
Layers
- Merge Group
Now
merge down you mask onto your white background
Open
pdc_paper 4 copy – paste as new layer
Close
Original
Open
pdc_frame1 copy – paste as new image resize 50%
close
original
copy
– paste as new layer
Highlight
your frame
Magic
Wand – Click inside your frame
Selections
– Modify – Expand Selections by 5%
Selections
– Invert
Highlight
pdc_paper 4
add
your tube
Delete
– Select none (ctrl+d)
Selections
– Select All
Image
– Crops to Selection (Shift+r)
Now
add your tube again this time outside the frame move to left
resize
to your liking.
Now
highlight background mask
Open
pdc_flowers 9 Copy – Paste as new image
Close
original
Resize
85%
Copy
– paste as new layer
Drop
Shadow
V
& H: 2
Opacity:45
Blur:3.00
Open
pdc_sun1 resize 50%
Copy
– paste as new layer
Close
original
Open
pdc_wreath 1
Open
pdc_mushroom 1
Resize
both 65%
Same
drop shadow
Now
new layer and add you copyright info. and your name.
Merge
Visible
Save
as png.
Would
love to see your results.
.................................................
Signature Tags
......................................................
Snags
.......................................................................
Incredimail Letter
Click the image for download.
Wednesday, August 21, 2013
Al Rio, Mal Berri, Melissa Diaz, Michele Ann, Sandra Chang-Adair
It's been some time since I've been in and posted anything new. I've been a naughty tagger and my mojo had left the building. I did do a number of snaggables/extras and some stationery last week, but forgot all about posting it for you all. Again, my mind must have left the building. I keep hoping to find it again. My head is a bit lonely without it - LMAO. Anyway, I do have some new shares for you using some great artwork. I hope you find something you like. Please remember not to use these artists work without a proper license.
Enjoy.
A Rose Tutorial Featuring Artwork by Miss Kajun Kitty
For
this Tutorial I am using the work of
This
is a PTU Tube.
If
using this tube,
make
sure you have the proper licenses.
You
can get this tube at
This
mask I am using is Spawns FS Mask 05
You
can find at “Spawn's
Forum Set Mask”
You
will no Filters
Lets
get started ...
New
Image 600 x 250 Transparent
Pick
a dark color from your tube
Flood
fill
Layers
new layer
Pick
a lighter color from your tube
Flood
fill
Layers
– Load/Save Mask - Load Mask From Disk
With
setting as below.
Layers
- Merge Group
Now
for your tube, I resized mine to 280 x 400 Pixels
Then
once added as new layer resized 75%
Move
to the left.
Add
new layer
Flood
fill with another color from your tube.
Selections
– Select All
Selections
– Modify – Contracts by 3%
Delete
– Select None (ctrl+d)
Drop
Shadow
V:
2
H:
-2
Opacity:
75
Blur:
2.00
Drop
Shadow
V:
-2
H:
2
Opacity:
75
Blur:
2.00
Now
add your name and copyright information.
Let's
Animate
Highlight
your mask layer
Adjust
– Add/Remove Noise
Add
Noise
Gaussian
Noise:
15%
Monochrome
Checked
Copy
Merged
Open
your Animation Shop
Paste
as a new animation
Back
to your PSP
Add
Noise
Gaussian
Noise:
15%
Monochrome
Checked
Copy
Merged
Back
to AS
Paste
after current frame
Save
as gif.
Would
love to see your results.
..................................................................................
Signature Tags
........................................................................................
Snags
Tuesday, August 20, 2013
Melissa Diaz Signature Tags
Monday, August 19, 2013
Endless Story Featuring Artwork By Miss Kajun Kitty
For this Tutorial I am using the work of
This is a PTU Tube.
If using this tube,
make sure you have the proper licenses.
You can get this tube at
I am also using the Scrapkit called “Endless Story”
this is a PTU Kit you can find at
You can use any kind a mask you like.
You will need no Filter
Lets get started ...
New Image 800 x 800 Transparent
Open RD_ES_paper 01
Copy – Paste as new layer
Close Original paper
Layers – Load/Save Mask - Load Mask From Disk
With setting as below.
Layers - Merge Group
With Mask Background Highlighted
Open
RD_ES_Butterflies
RD_ES_Drapery
Duplicate - Mirror
RD_ES_Petals 02
Copy – Paste as new layer
Close Original
Add your tube.
Close Original Tube.
Add Drop Shadow to all
V:-3
H: 3
Opacity: 45
Blur: 3.00
Now new layer and add you copyright info. and your name.
Merge Visable
Resize
Adjust - Sharpness - Sharpen
Save as “Png”
Would love to see your results.
....................................................
Signature Tags
....................................................
Signature Tags
..............................................................................................
Snags
Subscribe to:
Comments
(Atom)
Search
Translator
CT Call
Tubers Wanted
ADI Creative Team
• Samantha
CT Members
• Alicat's Art
• Felinesrus
• Crazed Creations by Crystal
• Nora's Den
• Munday's Mayhem
• Venomous Creations
Labels
- ADI news (1)
- Al Rio (41)
- Alan Gutierrez (7)
- Alex (17)
- Alex Marek-Musat (1)
- Alicat's Art (5)
- Always Creations (32)
- Animated (39)
- Art Whimsico (4)
- artistic dreams (14)
- artists (4)
- auction (2)
- Baron von Lind (4)
- BCA (10)
- Becca Moore (11)
- Becca Turner (5)
- Bob Patterson (2)
- Breast Cancer (6)
- Brooke Gillette (12)
- CaperGirl42 (1)
- Carla Morrow (2)
- Carol Ochs (7)
- Catherine Swinford (1)
- ceat (1)
- Cecil Paplinskie (2)
- Celine (2)
- Chasity IJAmes (14)
- Christina Deljanov (3)
- Christmas (4)
- Cindy Thorrington-Haggerty (1)
- Circle of Hope (2)
- cluster frames (1)
- Copyright (1)
- Copyright Compliancy (1)
- creative team (341)
- CT (19)
- CT Tag (50)
- CT Team (95)
- CT Tutorial (103)
- DCSMC (1)
- Deanna Bach-Talsma (1)
- Deanna Davoli (10)
- Deep's Designz (5)
- Della Lindsey (4)
- Derk Hansen (3)
- Dwight Sanchez (3)
- Ed Hicks (4)
- Elaina Wagner (14)
- Elisa Ferguson (5)
- Facebook Timeline (33)
- forum set (28)
- freebies (5)
- ftu tutorial (23)
- FwTags Creations (1)
- Gina Marie (1)
- Grim Creationz (4)
- Group Info (1)
- Halloween (6)
- Heather Valentin (10)
- Ian Daniels (5)
- in memoriam (3)
- incredimail letters (84)
- Izabela Bzymek (3)
- Jacqueline Collen-Tarrolly (16)
- Jenna Whyte (15)
- Jessica Allain (26)
- Jessica Morgan-Chase (4)
- Joe Peck (8)
- John Gladman (9)
- John Pilkington (1)
- Josephine Wall (3)
- Judy Mastrangelo (14)
- Julie Rabischung (3)
- K DuFresne (1)
- Kaedee (29)
- Karen Singleton (2)
- Katrina Winter (1)
- KCreations (11)
- Kent Steine (1)
- Kimberly Irene Hunt (1)
- Kyra Wilson (3)
- LadyDragus (11)
- Ladywhisper (1)
- Lena Bazhenova (2)
- Leslie Tribolet (5)
- LGDesigns (32)
- Lynx Tutorials (68)
- Mal Berri (11)
- Malberri (5)
- Mark Blanton (2)
- Melissa Diaz (4)
- Michele Ann (14)
- Michelle Ann (2)
- Michelle Munday (3)
- Miss Kajun Kitty (12)
- Monika Holloway (3)
- Monika Jasnauskaite (2)
- Monika Ptok Byard (8)
- Natacha Chohra (2)
- New Releases (11)
- No Scraps (15)
- Nora's Den (32)
- Norma J.Burnell (20)
- Octavia Vaughan (1)
- Phillip Malpass (3)
- Photoshop tut (2)
- png (12)
- Positions Available (1)
- Poupee De Chair (1)
- psp (5)
- PTU (36)
- Ralph Macrey (72)
- Rebecca Barkley (4)
- Rebecca Cox (7)
- Rebecca McCullough (1)
- Red Sangre (3)
- Renee Lavoie (1)
- Robin Pushay (26)
- Russ Docken (3)
- Sandee Edgar (1)
- Sandra Chang-Adair (4)
- SassyDebs (2)
- SassyDebs Tuts (2)
- scrapkits (4)
- Sherbears (1)
- Sherri Tucker (1)
- signature tags (186)
- snags (128)
- Sweet Pin-up (1)
- TanDoll (9)
- Tania Santos (3)
- Tara Medrano (1)
- Terrell Dorfeo (5)
- The >^.^< Den (79)
- Tim Walters (8)
- timeline covers (3)
- Toadstool Farm (3)
- Tori Beveridge (10)
- Toxic-candy (17)
- Tricia Shanabruch (2)
- Tutorial (47)
- tutorials (77)
- Tuts By Ariez Moon (3)
- TutSations by Callie (3)
- Ty Wilson (11)
- Venomous Creations (47)
- wallpapers (7)
- Wassim Jalassi (9)
- Wassim Jelassi (20)
- Whispering Peace (1)
- White Rose Scraps (1)
- William Rumley (1)
- Yannomi (3)
- Yvonne Gilbert (4)
Blog Archive
-
►
2016
(13)
- ► 12/11 - 12/18 (2)
- ► 12/04 - 12/11 (1)
- ► 11/27 - 12/04 (5)
- ► 11/20 - 11/27 (1)
- ► 09/04 - 09/11 (1)
- ► 08/28 - 09/04 (1)
- ► 06/19 - 06/26 (2)
-
►
2015
(1)
- ► 01/25 - 02/01 (1)
-
►
2014
(225)
- ► 11/09 - 11/16 (6)
- ► 11/02 - 11/09 (4)
- ► 10/26 - 11/02 (6)
- ► 10/19 - 10/26 (5)
- ► 10/12 - 10/19 (4)
- ► 10/05 - 10/12 (2)
- ► 09/28 - 10/05 (6)
- ► 09/21 - 09/28 (2)
- ► 09/14 - 09/21 (5)
- ► 09/07 - 09/14 (3)
- ► 08/31 - 09/07 (5)
- ► 08/24 - 08/31 (3)
- ► 08/17 - 08/24 (8)
- ► 08/10 - 08/17 (2)
- ► 08/03 - 08/10 (4)
- ► 07/27 - 08/03 (7)
- ► 07/20 - 07/27 (2)
- ► 07/13 - 07/20 (11)
- ► 07/06 - 07/13 (11)
- ► 06/29 - 07/06 (7)
- ► 06/22 - 06/29 (11)
- ► 06/15 - 06/22 (9)
- ► 06/08 - 06/15 (8)
- ► 06/01 - 06/08 (7)
- ► 05/25 - 06/01 (9)
- ► 05/18 - 05/25 (3)
- ► 05/11 - 05/18 (7)
- ► 05/04 - 05/11 (8)
- ► 04/27 - 05/04 (4)
- ► 04/20 - 04/27 (4)
- ► 04/13 - 04/20 (7)
- ► 04/06 - 04/13 (4)
- ► 03/30 - 04/06 (3)
- ► 03/23 - 03/30 (5)
- ► 03/16 - 03/23 (10)
- ► 03/09 - 03/16 (1)
- ► 02/23 - 03/02 (1)
- ► 02/09 - 02/16 (6)
- ► 02/02 - 02/09 (2)
- ► 01/26 - 02/02 (4)
- ► 01/19 - 01/26 (5)
- ► 01/12 - 01/19 (2)
- ► 01/05 - 01/12 (2)
-
▼
2013
(204)
- ► 12/29 - 01/05 (3)
- ► 12/15 - 12/22 (1)
- ► 12/08 - 12/15 (1)
- ► 12/01 - 12/08 (2)
- ► 11/17 - 11/24 (5)
- ► 11/10 - 11/17 (3)
- ► 11/03 - 11/10 (8)
- ► 10/27 - 11/03 (8)
- ► 10/20 - 10/27 (5)
- ► 10/13 - 10/20 (5)
- ► 10/06 - 10/13 (7)
- ► 09/29 - 10/06 (2)
- ► 09/22 - 09/29 (8)
- ► 09/15 - 09/22 (12)
- ► 09/08 - 09/15 (5)
- ► 09/01 - 09/08 (4)
- ► 08/25 - 09/01 (5)
- ▼ 08/18 - 08/25 (5)
- ► 08/11 - 08/18 (3)
- ► 08/04 - 08/11 (2)
- ► 07/28 - 08/04 (23)
- ► 07/21 - 07/28 (10)
- ► 07/14 - 07/21 (2)
- ► 06/30 - 07/07 (6)
- ► 06/23 - 06/30 (6)
- ► 06/09 - 06/16 (3)
- ► 05/26 - 06/02 (1)
- ► 05/19 - 05/26 (2)
- ► 05/12 - 05/19 (2)
- ► 05/05 - 05/12 (4)
- ► 04/28 - 05/05 (4)
- ► 04/21 - 04/28 (4)
- ► 04/07 - 04/14 (2)
- ► 03/31 - 04/07 (2)
- ► 03/24 - 03/31 (4)
- ► 03/17 - 03/24 (4)
- ► 03/10 - 03/17 (1)
- ► 03/03 - 03/10 (3)
- ► 02/24 - 03/03 (3)
- ► 02/17 - 02/24 (1)
- ► 02/10 - 02/17 (4)
- ► 02/03 - 02/10 (2)
- ► 01/20 - 01/27 (1)
- ► 01/13 - 01/20 (13)
- ► 01/06 - 01/13 (3)
-
►
2012
(210)
- ► 12/30 - 01/06 (2)
- ► 12/16 - 12/23 (1)
- ► 12/09 - 12/16 (3)
- ► 12/02 - 12/09 (6)
- ► 11/25 - 12/02 (3)
- ► 11/18 - 11/25 (3)
- ► 11/11 - 11/18 (3)
- ► 11/04 - 11/11 (16)
- ► 10/28 - 11/04 (7)
- ► 10/21 - 10/28 (3)
- ► 10/14 - 10/21 (1)
- ► 10/07 - 10/14 (1)
- ► 09/30 - 10/07 (4)
- ► 09/23 - 09/30 (2)
- ► 09/16 - 09/23 (5)
- ► 09/09 - 09/16 (10)
- ► 09/02 - 09/09 (10)
- ► 08/26 - 09/02 (12)
- ► 08/19 - 08/26 (6)
- ► 08/12 - 08/19 (1)
- ► 08/05 - 08/12 (4)
- ► 07/22 - 07/29 (6)
- ► 07/15 - 07/22 (2)
- ► 07/08 - 07/15 (8)
- ► 07/01 - 07/08 (1)
- ► 06/24 - 07/01 (2)
- ► 06/03 - 06/10 (3)
- ► 05/20 - 05/27 (1)
- ► 05/13 - 05/20 (2)
- ► 04/29 - 05/06 (1)
- ► 04/22 - 04/29 (4)
- ► 04/15 - 04/22 (1)
- ► 04/08 - 04/15 (3)
- ► 04/01 - 04/08 (2)
- ► 03/25 - 04/01 (7)
- ► 03/18 - 03/25 (7)
- ► 03/11 - 03/18 (7)
- ► 03/04 - 03/11 (14)
- ► 02/26 - 03/04 (21)
- ► 02/19 - 02/26 (8)
- ► 02/12 - 02/19 (2)
- ► 02/05 - 02/12 (1)
- ► 01/29 - 02/05 (3)
- ► 01/01 - 01/08 (1)


