


Showing posts with label png. Show all posts
Showing posts with label png. Show all posts
Thursday, October 31, 2013
Xmas Cheer

Xmas tutorial featuring the amazing artwork of "Al Rio"
...................................................................
Signature Tags


Monday, October 7, 2013
Trick or Treat

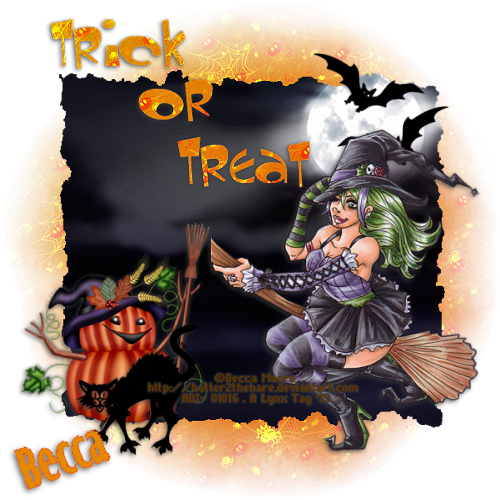


Thursday, October 3, 2013
Haunted Fun

This is a png tutorial featuring the amazing artwork by "Alex"
You can find the tutorial here ...
Signature Tags


Saturday, September 28, 2013
Halloween Mash Featuring Artwork By Ty Wilson


Tuesday, September 24, 2013
Lost Souls Tutorial Featuring Artwork by "Michele Ann"

This
tutorial is my own creation,
any
resemblance to any other,
is
only coincidence and not intentional.
Written:
9/24/13
…..........................................
For
this Tutorial I am using the work of
If
using this tube,
make
sure you have the proper licenses.
You
can purchase this tube at
I
am also using the Scrapkit called “Dark Shadows”
this
was a PTU now FTU you can find at
You
can use any kind a mask you like.
I
am using MontiCircleMask
You
can find this mask at
You
will no Filters
Lets
get started ...
New
Image 800 x 800 Transparent
Open
paper 17
Copy
– Paste as new layer
Close
Original paper
Layers
– Load/Save Mask - Load Mask From Disk
Layers
- Merge Group
Add
your tube resize if needed
I
resized mine 525 x 700 pixels
Drop
Shadow
Vertical:
-2
Horizontal:
2
Opacity:
50
Blur:
3.00
Add
Fog move below tube. Resize 75%
Now
highlight background mask
Add
Elements
Sparkles
1 – resize 75%
Sparkles
2 – resize 75%
Graves
– resize 75%
Now
new layer and add you copyright info. and your name.
Merge
Visible
Save
as “Png”
Would
love to see your results.
...........................................................
Signature Tags


Saturday, September 21, 2013
Blood Thrist Tutorial Featuring Artwork of Michele Ann

This
tutorial is my own creation,
any
resemblance to any other,
is
only coincidence and not intentional.
Written:
9/21/13
…..........................................
For
this Tutorial I am using the work of
If
using this tube,
make
sure you have the proper licenses.
You
can purchase this tube at
I
am also using the Scrapkit called “Blood Thristy”
this
was a PTU now FTU you can find at
You
can use any kind a mask you like.
I
am using MontiCircleMask
You
can find this mask at
You
will no Filters
Lets
get started ...
New
Image 792 x 792 Transparent
Open
paper 4
Copy
– Paste as new layer
Close
Original paper
Layers
– Load/Save Mask - Load Mask From Disk
Layers
- Merge Group
Add
your tube resize if needed
Drop
Shadow
Vertical:
-2
Horizontal:
2
Opacity:
50
Blur:
3.00
Now
highlight background mask
Add
Elements
Blood
Bag – resize 50% - move to the right
Cocktail2
– resize 65%
Metal1
– Resize 75%
Skull1
– Resize 50% - move to the left
Sparkles2
– Resize 75%
Now
new layer and add you copyright info. and your name.
Merge
Visible
Save
as “Png”
Would
love to see your results.
.............................................................................
Signature Tags


Thursday, September 19, 2013
"The Witching Hour" Tutorial Featuring Artwork by TanDoll

This
tutorial is my own creation,
any
resemblance to any other,
is
only coincidence and not intentional.
Written:
9/19/13
…..........................................
For
this Tutorial I am using the work of
If
using this tube,
make
sure you have the proper licenses.
You
can purchase this tube at
I
am also using the Scrapkit called “Haunted Fun”
this
was a PTU now FTU you can find at
You
can use any kind a mask you like.
I
am using MontiCircleMask
You
can find this mask at
You
will no Filters
Lets
get started ...
New
Image 792 x 792 Transparent
Open
paper 1
Copy
– Paste as new layer
Close
Original paper
Layers
– Load/Save Mask - Load Mask From Disk
Layers
- Merge Group
Add
your tube resize if needed – I resized mine 65%
Drop
Shadow
Vertical:
2
Horizontal:
2
Opacity:
50
Blur:
3.00
Now
highlight background mask
Add
Elements
Witch
Cat3
– resize 75% - move to the right
Fog
pumpkin
– Resize 75% - move above your tube
Now
new layer and add you copyright info. and your name.
Merge
Visible
Save
as “Png”
Would
love to see your results.
..................................................
Signature Tags


Candy Corn Tutorial Featuring Artwork by TanDoll

This
tutorial is my own creation,
any
resemblance to any other,
is
only coincidence and not intentional.
Written:
9/19/13
…..........................................
For
this Tutorial I am using the work of
If
using this tube,
make
sure you have the proper licenses.
You
can purchase this tube at
I
am also using the Scrapkit called “Haunted Fun”
this
was a PTU now FTU you can find at
You
can use any kind a mask you like.
I
am using MontiCircleMask
You
can find this mask at
You
will no Filters
Lets
get started ...
New
Image 792 x 792 Transparent
Open
paper 1
Copy
– Paste as new layer
Close
Original paper
Layers
– Load/Save Mask - Load Mask From Disk
Layers
- Merge Group
Add
your tube resize if needed – I resized mine 85%
Now
highlight background mask
Add
Elements
Cat2
– resize 75% - move to the right
Mice
– Resize 75%
Bat3
– Resize 75%
Sparkles1
– Resize 75%
Now
new layer and add you copyright info. and your name.
Merge
Visible
Save
as “Png”
Would
love to see your results.
.........................................................
Signature Tags


Tuesday, September 17, 2013
End Of Summer Tutorial Featuring Artwork by "John Gladman"

For
this Tutorial I am using the work of
This
is a PTU Tube.
If
using this tube,
make
sure you have the proper licenses.
You
can get this tube at
I
am also using the Scrapkit called “Summer End”
this
is a PTU Kit you can find at
You
can use any kind a mask you like.
You
will no Filters
Lets
get started ...
New
Image 800 x 800 Transparent
Open
pcd_paper 4
Copy
– Paste as new layer
Close
Original paper
Layers
– Load/Save Mask - Load Mask From Disk
With
setting as below.
Layers
- Merge Group
Open
pdc_paper 7 copy – paste as new layer
Close
Original
Open
pdc_frame1 copy – paste as new image
close
original
copy
– paste as new layer
Highlight
your frame
Magic
Wand – Click inside your frame
Selections
– Modify – Expand Selections by 5%
Selections
– Invert
Highlight
pdc_paper 7
Delete
Select
None (ctrl+d)
Add
Tube resize if needed, I resized mine 85%
Highlight
your frame and duplicate it
Move
duplicated layer above tube
Duplicated
layer highlighted – Use your eraser tool
50%
and erase the top part so the head is coming out of the frame
Highlight
your tube and erase the bottom part of your tube.
Selections
– Select All
Image
– Crop to Selections
close
background mask and background pp 7
Merge
Visible
Open
pp7
Merge
Visible
Resize
frame 85%
Open
your mask layer
frame
highlighted
Open
pdc_flowers 9 resize 85%
Add
pdc_bird 3 resize 75% 3 times
Close
original
Copy
– paste as new layer
Drop
Shadow
Vertical:
-2
Horizontal:
2
Opacity:45
Blur:3.00
Highlight
your mask layer
Add
pdc_flowers 4 resize 75% - duplicated
Image
- Mirror
place
a little above the frame.
Same
Drop shadow as above.
Now
new layer and add you copyright info. and your name.
Merge
Visible
Save
as png.
Would
love to see your results.
..............................................................................................
Signature Tags


.................................................................................................
Incrediamil Letter

Click the image above if you want to download the IM letter.
Saturday, September 14, 2013
The Monster Bash Featuring Artwork of Ty Wilson

This tutorial is my own creation, any resemblance to any other is only coincidence and not intentional
Written: 9/14/13
.......................................................................................
For this Tutorial I am using the work of
©Ty Wilson
If using these tubes make sure you have the proper licenses.
You can purchase the tube from
Scrapkit I am using is a PTU kit by “Cindy's Creative Designs”
You can find “Spooky Nightmare” Kit at any of the store on her Blogs.
Any mask will do.
The Mask I am using is MontiCircleMask
You will need no Filters
Lets get started ...
Open New Image 800 x 800 Transparent
Open ccd_pp7 copy – paste as new layer
Close original
Layers – Load/Save Mask – Load Mask From Disk
Create Mask From: Luminance Source
Orientation: Fit Canvas
Options: Invert Transparency Un-Checked - Hide all mask
Load
Layers – Merge Groups
Highlight Mask layer
Add your tube resize if needed
Mask still highlighted
Open ccd_bling#3 – resize 75%
ccd_Tombstone #1 – resize 75%
ccd_Ghost#1 – resize 75%
ccd_bat#2 – resize 75% 3 times
copy – paste as new image
Merge Visible
Layers – New Layer now add your copyright information
and your name.
Save as a png.
I would love to see your results ♥
......................................................................................
Signature Tags


Thursday, September 12, 2013
Speak No Evil Featuring Artwork of Michele Ann

This tutorial is my own creation,
any resemblance to any other is only coincidence
and not intentional.
Written: 09/12/13
…...........................................
For this Tutorial I am using the work of
This is a PTU Tube.
If using this tube,
make sure you have the proper licenses.
You can get this tube at
The Scrapkit I am using is a PTU Kit called “Dark Night”
The Designer is “Rissa's Designs”
You can find where to purchase this kit on her blogs.
Use Mask of choice any mask should do.
The Mask I am using is MontiCircleMask
You can find it at “Monti's Pixel Playground”
You will need no Filters
Lets get started …
Open new image 800 x 800
Open RD_DN_paper2
copy – paste as new layer
Close original
Layers – Load/Save Mask -Load Mask From Disk
Layers – Merge – Merge Group
Rename Mask Layer
Add Tube Resize if needed
Highlight your Mask layer
Open Elements
RD_DN_Birds – resize 75%
RD_DN_Rubble2
RD_DN_Darkbooks – resize 50%
RD_DN_Snake – Resize 60%
RD_DN_Eye – Resize 75%
RD_DN_Tombstone 3
RD_DN_Tree
Drop Shadow
Vertical: -2
Horizontal: 2
Opacity: 45
Blur: 3.00
On the items you want to stand out more.
Merge Visible
Layers – New Layer and your copyright information.
Add your name
Merge Visible
Save as png.
Would love to see your results.
...............................................
Signature Tags


.......................................................................................
Incredimail Letter

Click the above image to download the IM Stats
Subscribe to:
Posts
(Atom)
Grab Our Button